
There might come a time when you need to remove your GE oven door, whether for cleaning, repair, or even moving.
In this step-by-step guide, we'll walk you through the detailed process for older and newer models.
We'll also share some safety tips and common pitfalls to avoid so you can safely and effectively remove your GE oven door.
How Does the GE Oven Door Work?
The GE oven door, designed for easy access and optimal heat retention, is primarily attached via hinges, enabling its open-and-close mechanism.
Most models feature a system of top-opening, pull-down doors with hinges mounted at the bottom. When closed, the door forms an airtight seal, ensuring heat is trapped inside.
The GE oven door comprises several components, including the door handle, the door seal, and the inner and outer glass panels.
The door handle is typically made of sturdy stainless steel. The door seal, essential in forming the airtight barrier, is made from heat-resistant materials like silicone or rubber.
Additionally, the door features an inner and outer glass panel for insulation, with the inner panel being removable for easy cleaning.
Are All GE Oven Doors Removable?
GE wall ovens and ranges are generally designed with lift-off doors, facilitating installation, cleaning, and servicing.
While this applies to many models, there are exceptions. The specific process or ability to remove the door might differ for certain models.
So, referring to the owner's manual for model-specific guidelines is always a good idea.
Why You Might Need to Remove Your Oven Door
You may need to remove the oven door for various reasons, including cleaning, repairs, oven glass replacement, readjustment, or moving or transporting the oven.
Cleaning Purposes
Over time, your oven can accumulate grease, food spills, and residues. These can get trapped between the door's inner and outer glass panels.
Removing the door facilitates a comprehensive cleaning, ensuring optimal oven hygiene and functionality.
Once you've successfully removed the oven door, cleaning becomes much more straightforward.
For a deep dive into maintaining the pristine look of your oven, don't miss our guide on How to Clean Oven Door Glass?
Repair
The GE oven door's mechanism, although robust, can face wear and tear or mechanical issues. For effective repair or part replacement, the door's removal becomes essential.
Oven Glass Replacement
A cracked or damaged panel not only looks unappealing but can also affect the oven's insulation. Removing the door simplifies the process of glass replacement.
Readjustment
Over prolonged use, the GE oven door might go out of alignment or not seal properly. In such cases, removing it allows for proper readjustment, ensuring efficient oven operation.
Moving or Transporting the Oven
If you're moving or transporting your oven, you'll need to remove the door to make it easier to handle. This will also help prevent damage to the door or hinges during the move.
How to Remove a GE Oven Door on Older Models
Removing the door from older GE oven models, such as the Spectra series, can be straightforward when done with care and the right approach.
Tools You'll Need:
- Safety gloves for protection.
- Soft cloth to lay the door on.
- Phillips head screwdriver (optional).
Step 1: Open the Door to Broil Position
Open the oven door just a few inches until you find the natural stop for the broil position, where the door remains partially open.
Speaking of broiling, have you ever wondered if you need to crack the oven door when using the broil setting? Get clarity on this common query here.
Step 2: Lift the Door
Position your hands along each side edge of the door, roughly halfway down. Carefully lift the door straight up, unseating it from its hinges.
If it doesn't come off easily, check for 2 Phillips head screws inside near the hinges, which might be securing it.
Step 3: Clean or Repair Your Oven Door
With the door detached, you can clean or conduct any necessary repairs.
Step 4: Reinstallation
Hold the oven door level and center it directly over the partially open hinges.
Slide the door down carefully onto the hinge prongs. Ensure the door is completely seated on the hinges, with its top edge level.
After reinstallation, open and close the door a couple of times to ensure it operates smoothly.
For a better visual understanding, you might find this YouTube video helpful.
How to Remove a GE Oven Door on Newer Models
Removing the door can be a bit more challenging with newer GE oven models. These steps can make the task straightforward and ensure it's done safely.
Tools You'll Need:
- Safety gloves to protect your hands.
- Flat-blade screwdriver (optional).
- Soft cloth or towel to protect the oven door when placed down.
Step 1: Open the Door All the Way
Begin by fully opening your GE oven door.
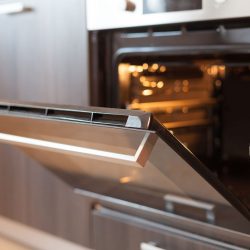
Step 2: Unlock the Hinge Locks
On the newer models, you'll come across hinge locks or brackets designed to secure the door. You'll find these locks close to where the door joins the oven body.
To disengage them, pull both hinge locks down towards the door frame to reach the unlocked position.
Sometimes, you might need a flat-blade screwdriver to help with this step. Ensure you've fully unlocked or unclipped these locks before proceeding.
Step 3: Lift the Door
With the locks disengaged, Grasp the door firmly on both sides. Lift it upward and outward until the hinge arms are free from their slots.
The door is heavy, so be sure to have a solid grip and lift cautiously.
Step 4: Clean or Repair Your Oven Door
Once removed, you can proceed with cleaning, repairs, or other maintenance tasks. Avoid placing the removed door on its handle to prevent potential damage.
Step 5: Reinstall the Oven Door
To reinstall, align the door with the hinges, ensuring it fits securely. Slide it back into place.
Step 6: Close the Hinge Locks
Remember to lock or clip the hinge locks back into place after reinstalling the door.
Step 7: Close the Oven Door
Gently close the oven door, ensuring it operates smoothly and seals properly.
You can watch the video below for a clearer visual representation.
Safety Tips When Removing a GE Oven Door
Removing a GE oven door may seem simple, but it can be dangerous if not done correctly. Here are some safety tips to keep in mind when removing your GE oven door:
- Make sure the oven's power is turned off. This will prevent any accidental electric shock from occurring while you are working on the oven.
- Before attempting to remove the door, ensure the oven has cooled down completely to avoid burns.
- The door is heavy. When lifting the oven door, use proper lifting techniques such as bending your knees and keeping your back straight.
- Removing the oven door can be a two-person job. Having someone to help you can make the process easier and safer.
Common Mistakes to Avoid When Removing a GE Oven Door
Removing an oven door might seem simple, but you can encounter some pitfalls. Here are common mistakes to sidestep:
- Forcing the Door: If the door doesn't come off easily, check for any additional locks or screws. Forcing it can cause damage.
- Neglecting the Manual: Always refer to the user manual for model-specific instructions. Not all GE oven models are the same.
- Incorrect Alignment: When reinstalling, ensure the door is correctly aligned with the hinges. Misalignment can affect the door's sealing and operation.
- Forgetting Hinge Locks: If your model has hinge locks, forgetting to lock them after reinstallation can pose risks.
- Skipping Safety Checks: Once reinstalled, always check the door's operation. Ensure it opens, closes, and seals properly before using the oven.
Final Thoughts
Removing a GE oven door might seem challenging at first, but it's more straightforward than you might think.
Keep in mind that the process may vary slightly depending on your specific model, so it's essential to consult your manual for model-specific instructions.
Just remember: it's always essential to focus on safety and follow the steps as described.
Now that you've mastered the art of removing and reinstalling your GE oven door, why not explore more about its functionalities?
Dive into our article, How to Set Delay Start Time on a GE Oven, to learn about another great feature of your appliance.
Related posts:
 How To Reverse The Door On Danby Refrigerator
 How To Adjust Whirlpool Refrigerator Door Swing
 What Color Hinges And Knobs For Gray Kitchen Cabinets?
![A Whirlpool refrigerator photographed up close, How To Remove Glass From A Whirlpool Refrigerator Shelf [Step By Step Guide] - 1600x900](https://kitchenseer.com/wp-content/uploads/2023/10/shutterstock_2324533829-250x250.jpg) How To Remove Glass From A Whirlpool Refrigerator Shelf [Step By Step Guide]
How To Remove Glass From A Whirlpool Refrigerator Shelf [Step By Step Guide]
 Cuisinart Toaster Oven Door Issues—What To Do?
 Why is My Oven Light Blinking? [Quick Guide to 6 Causes & Fixes]