When thinking about iconic summer foods, what comes to your mind? We're willing to bet that one of the summer foods you thought about was corn on the cob! The only downside to this delicious summer side is not being able to get it as fresh any other time of year. That's why it's so good to know the best ways to keep corn on the cob as fresh as possible. This includes figuring out if you can vacuum seal corn on the cob, and if so, how to do it. We looked into everything about vacuum-sealing corn on the cob to help make keeping this dish fresh easy for you.
Yes, you can vacuum seal corn on the cob. To make sure that the corn stays delicious for as long as possible, you will want to make sure to pick the freshest raw corn. For the best results, you should use a vacuum sealing appliance. There are some steps to take before you vacuum seal the corn to make sure that it keeps its flavor:
- Prepare the corn
- Blanch the corn
- Cool it
- Dry it as best as possible
- Seal it and save it
With this method, corn on the cob can be one of your favorite foods all year round! Before you run off and pick some corn to vacuum seal, there may be more information that you will want. Make sure that you keep reading down below for a comprehensive guide on the best way to vacuum seal corn on the cob.
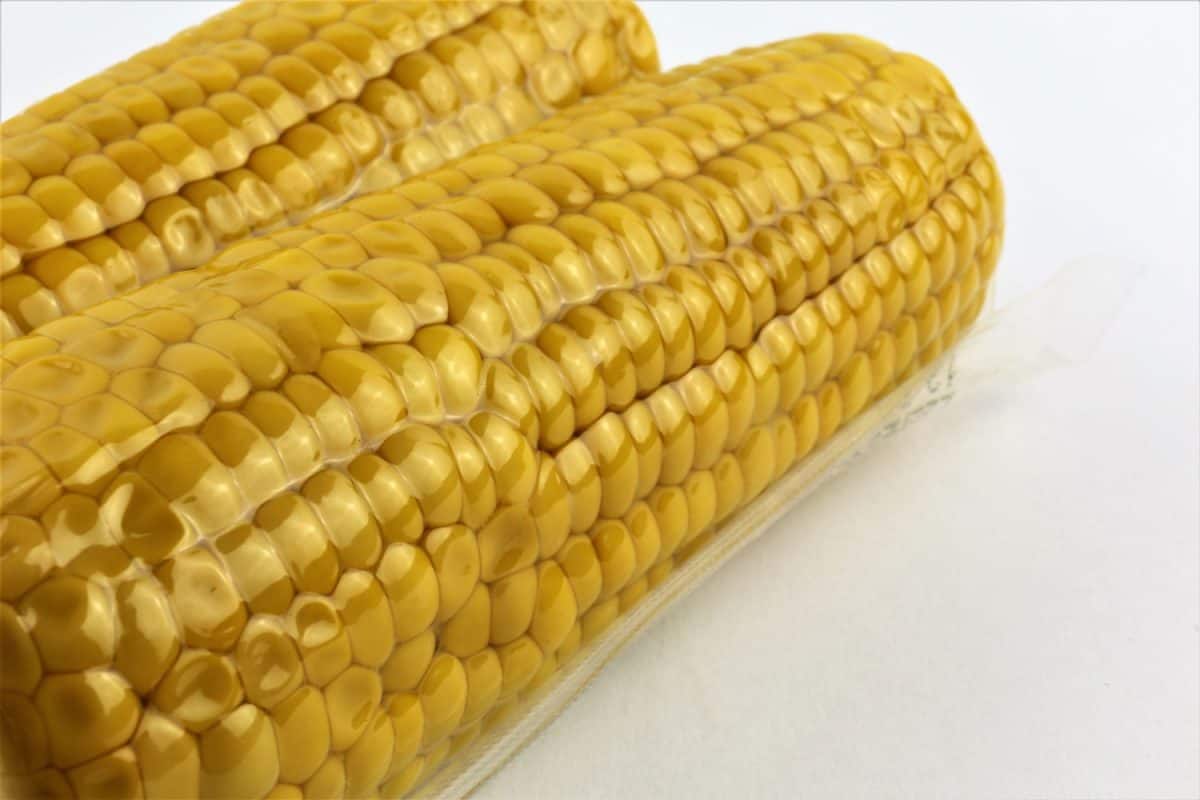
![Vacuum sealed fresh corncobs for sous vide cooking cutout on white, Can You Vacuum Seal Corn On The Cob? [And How To]](https://kitchenseer.com/wp-content/uploads/2021/07/Can-You-Vacuum-Seal-Corn-On-The-Cob-And-How-To.png)
How Do You Vacuum Seal Corn On The Cob?
Vacuum sealers are fantastic appliances that really help to keep food fresh for much longer than with traditional methods. Freezing already helps food last longer, but if you seal it first, then it can last a really long time. However, no matter how good they are at their job, you still have to prepare the corn to be vacuum sealed. If you don't take the proper steps, then the flavor and freshness won't be locked in as well. Here are some ways to get the best-kept corn possible!
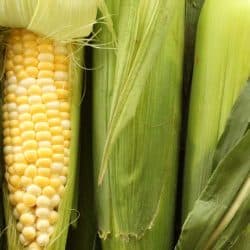
Pick The Freshest Corn
Whether you get your corn from the store, a farmer, or directly off the stalk, you need to know how to pick the freshest ones. The first thing you can do is just see how the husks look. Fresher corn will have the brightest green husks. Next, you'll want to check the silk strings on the corn. The main reason for this is to make sure there are no bugs or signs of any possible rot.
While you're checking the top of the ear of corn, look at the kernels as best as you can. You want your cobs to have plump bright yellow kernels and not tiny or discolored ones. The last thing you can do to check for freshness is to lightly puncture one of the pieces of corn while it's still on the cob. If drops of moisture come out, then that is also a very good sign for choosing the best corn.
For the best results, you'll want to do this process as soon as you get the corn. Store it in the fridge for a short time if necessary before preparing it.
1. Prepare The Corn
The first thing that has to be done to the corn is to shuck it. This is a quick process that gets the husk and all of the string off the cob. To do this, simply hold the ear of corn upright with the stem pointing towards the ground. Now, grab the loose part of the husk with as much of the silk string as possible and pull it down the length of the corn.
Once all of the husk and strings are at the bottom of the cob, you easily pull it off! Repeat this for all of your ears of corn. Lastly, rinse off your corn for good measure.
2. Blanch The Corn
Now that the corn is ready, you can get the water boiling to blanch it. Grab a large pot and fill it 3/4 of the way full. Make sure to leave some room at the top so it doesn't boil over.
Once the water is boiling, you can carefully place all of your prepared corn into the pot. Use tongs when doing this to remain as safe as possible. You'll want to let the corn boil for around 5 minutes, depending on the size of the cobs that you've purchased.
3. Cool It
After the corn has started to cook, it's important to stop the corn from continuing to cook as quickly as possible. To do this, place all of the corn in a bowl of ice water. This will make sure that the corn doesn't cook all the way. You just want the corn to cook a little to release its flavor and then lock the flavor in by putting it in the ice water. Leave the corn in the ice water for another 5 minutes.
4. Dry It As Best As Possible
Before coming to the final step of vacuum sealing the corn, it must be as dry as possible. After removing the corn from the ice water, you will want to pat it dry with a paper towel. Having the corn as dry as possible is important because it helps to create the best seal you can in the vacuum packs. The tighter the seal, the longer the corn will stay fresh!
5. Seal It And Save It
Now that the corn is fully prepared and blanched, it can be vacuum-sealed. Place the cobs into a bag that is compatible with your vacuum sealer. Then, follow the instructions on how to use your appliance and fully seal the corn into their bags.
Lastly, set the now vacuum-sealed bags into the freezer, and the corn will last for up to one year like this. Here is a great video showing exactly how to do these steps:

Click here to shop for vacuum sealers on Amazon!
More Questions About Vacuum Sealing Corn On the Cob
Now that you know how to vacuum seal corn on the cob, you can do the process for yourself. However, there is often more than one way to do things and questions that come up along the way!
Do You Need To Blanch Corn Before Vacuum Sealing?
In order to have as much flavor and freshness as possible, it should be blanched before vacuum sealing it. Blanching the corn helps to seal the freshness of the corn. It locks in all of the flavors so that it's not lost in the time that it sits in the freezer.
Can You Vacuum Seal Corn On The Cob In The Husk?
You can vacuum seal corn on the cob with the husk still on. In fact, many individuals prefer this method to the one highlighted above. The reason for this preference is that this method is faster! For this method, all you have to do is vacuum seal the cobs and then freeze them all while keeping the husks on. It allows you to skip blanching all together. You will have to try both methods for yourself to determine which one is your favorite!
How Long Can You Store Corn On The Cob In The Husk?
The time frame for keeping corn on the cob frozen with the husk method is comparable to the main method. The vacuum-sealed corn in the husk can be kept for around 1 year in the freezer. This time frame will be shorter if there is any moisture in the bags when the vacuum sealing takes place.
How To Cook Vacuum Sealed Corn On The Cob?
For the best results with cooking your vacuum-sealed corn, you should thaw it first before fully cooking it. You can either microwave it or leave it out to thaw more traditionally. Once it is thawed, you can cook it however you see fit. You can microwave it, boil it, steam it, or grill it. It's up to you how you prefer to cook your delicious corn on the cob!
Final Thoughts
![Vacuum sealed fresh corncobs for sous vide cooking cutout on white, Can You Vacuum Seal Corn On The Cob? [And How To]](https://kitchenseer.com/wp-content/uploads/2021/07/Vacuum-sealed-fresh-corncobs-for-sous-vide-cooking-cutout-on-white-1200x800.jpg)
Vacuum sealing corn on the cob is not only possible but also the best method for keeping this dish fresh for as long as possible! If you are using the main method of doing this, just make sure to blanch and dry the corn as much as possible before sealing it. You can also try sealing the corn with the husks still on and skip blanching all together. The taste may vary for this method but trying both for yourself is the best way to find a preference! Now enjoying tasty corn on the cob all year round is more than possible!
To learn more about the best things to put in the freezer, make sure that you click on the links below:
Does Almond Butter Freeze Well?